Electrical
Table of contents
Parts
| Item | Part Link | Comments |
|---|---|---|
| GBoost Battery (1x) | https://www.gboost.bike/shop/batteries/system-battery-extra-performance/ | |
| ODrive 3.6 56V (1x) | https://odriverobotics.com/shop/odrive-v36 | |
| D6374 150KV motor (2x) | https://odriverobotics.com/shop/odrive-custom-motor-d6374-150kv | |
| CUI AMT102-V 8192 CPR encoder (2x) | https://odriverobotics.com/shop/cui-amt-102 | |
| Teensy 4.1 (1x) | https://www.pjrc.com/store/teensy41.html | |
| Wireless Relay (1x) | https://www.amazon.com/dp/B098RSF6X3/ | |
| 4-Channel Relay Board (1x) | https://www.amazon.com/dp/B07BDJJTLZ/ | |
| Light Indicator Tower (1x) | https://www.amazon.com/dp/B01NBJ0K0W/ | |
| Anker 535 PowerHouse (1x) | https://www.anker.com/products/a1751?variant=41686355771542 |
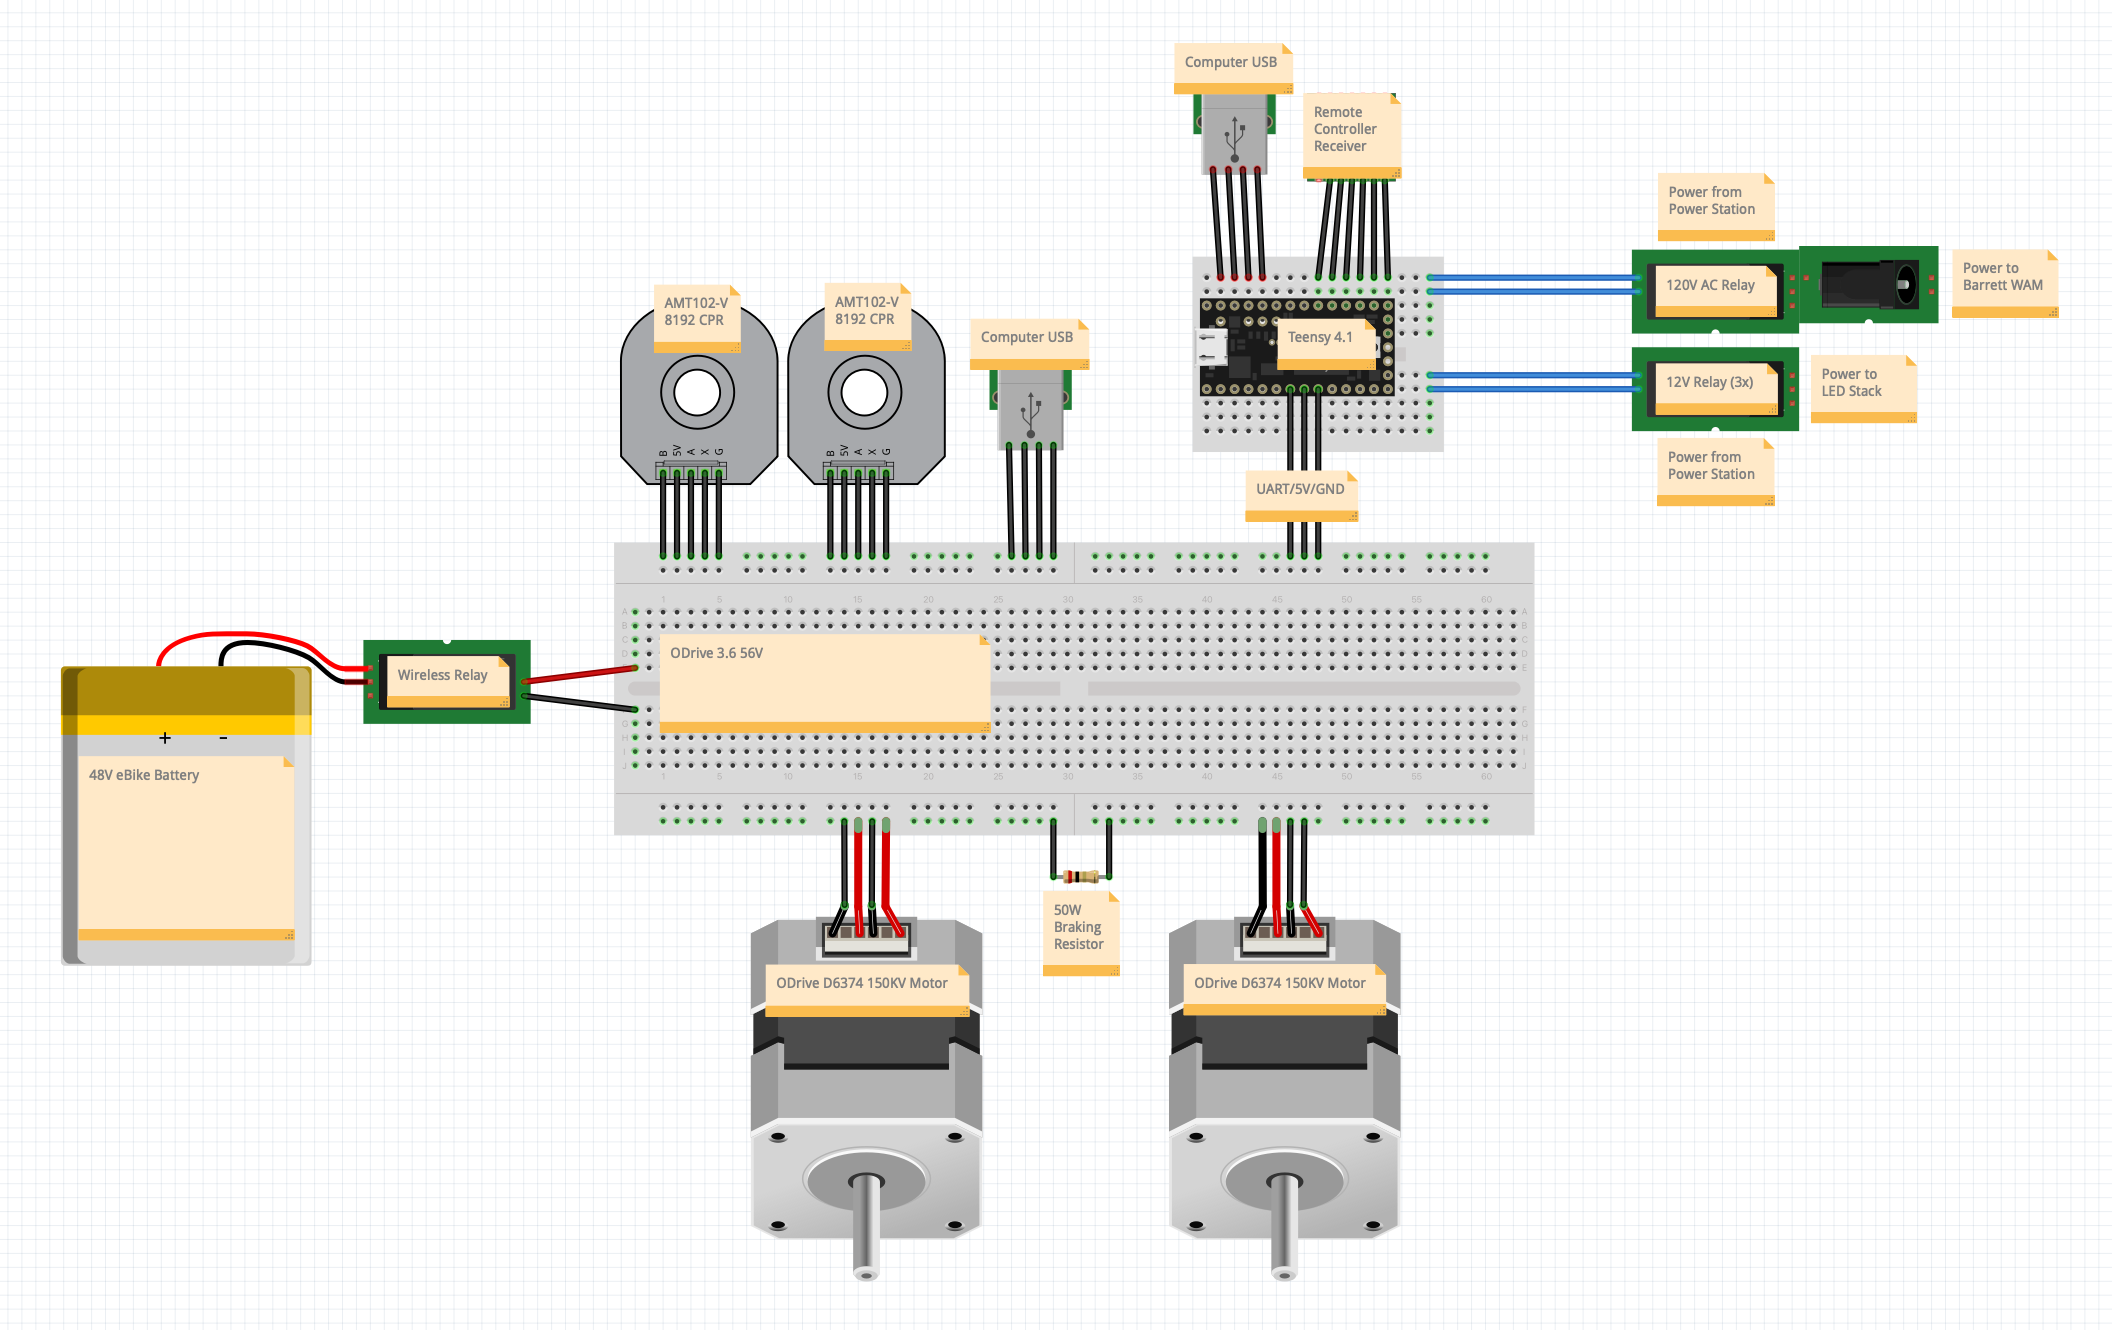
Wiring
To get started with the electrical system, a high level wiring diagram is shown below that needs to be assembled.
Firmware
To get the firmware setup, the code needs to be uploaded to the Teensy and the configuration needs to be uploaded to the ODrive.
Uploading Teensy Sketch
By using an Arduino add-on called Teensyduino, we are able to upload the sketch to the Teensy. Start by installing Teensyduino on your computer by following the installation instructions here. Once installed, upload the teensy_interface.ino sketch to the Teensy by plugging it into the computer via USB and setting the Tools > Board info as seen in the top of the teensy_interface.ino file.
Upon first upload of the sketch to the Teensy, the configuration stored in the EEPROM will not be valid and therefore will expect a remote calibration routine. More infromation about the remote calibration can be found here.
Uploading ODrive Config
To get the ODrive setup to communicate with the Teensy over UART and set up control mode values, we need to upload the configuration file to the ODrive. Start by powering on the ODrive by plugging it into the 48V eBike battery (or plugging it into a wall power supply). Install the odrivetool by following the installation instructions here. Then plug the ODrive into the computer via USB and upload the config.json using the odrivetool restore-config config.json command from a terminal. More info on configuration restore can be found here.
Now check out the software page to see how to setup the software system.